728x90

SEO의 기본 세팅은 다음과 같이 설정한다.

  1. 페이지마다 캐노니컬 태그를 설정
    <!DOCTYPE html>
    <html>
    <head>
      <link rel="canonical" href="https://example.com/page.php" />
    </head>
    <body>
    ...
    </body>
    </html>
  2. 태그와 메타 설정
    이미지 태그에 alt, head에 메타데이터, title은 페이지마다 달라야 하며 link에 alt도 붙여야한다.
    apple.com은 SEO를 위해 다음과 같이 meta tag를 설정해 놓았다
    - apple home(www.apple.com)

    - apple watch(www.apple.com/watch)
  3. 페이지 속도 개선
    PageSpeedInsights에서 웹페이지 속도 개선에 대해 리포팅을 받아볼 수 있다.
  4. 구조화
    HTML5의 tag들이 sementic 하게 맞춰 설계되어야한다. https://search.google.com/test/rich-results
  5. 사이트맵의 정기적인 관리
     사이트맵을 주기적으로 갱신한다.


Vue 프로젝트를 google SEO에 등록하기 위해서는 크게 2가지 방법이 있다.

  1. vue-meta 이용하여 페이지별 meta tag 작성
  2. prerender-spa-plugin 이용하여 SSR 페이지 만들기 

첫번째 방법이 보다 편하므로 페이지별 meta tag를 이용하여 Vue 프로젝트의 SEO를 구현토록하자.


  1. vue-meta 라이브러리를 프로젝트에 설치한다.
    현시점 vue3에 적용가능한 vue-meta 라이브러리는 3.0.0-alpha.10 까지 나와있다
    npm i --save vue-meta@alpha
  2. vue가 vue-meta 플러그인을 사용할 수 있도록 해당 플러그인 라이브러리를 등록한다
    //main.ts
    import { createApp } from 'vue';
    import { createMetaManager } from 'vue-meta';
    import App from './App.vue';
    
    app
      .use(createMetaManager())
      .mount('#app');
  3. default meta tag를 설정한다
    - index.html 설정
    og란: open graph의 약자로  어떤 HTML 문서의 메타정보를 쉽게 표기하기 위해서 메타정보에 해당하는 제목, 설명, 문서타입, 대표 URL등을  정의할 수 있게해주는 프로토콜.
    <!DOCTYPE html>
    <html lang="en">
      <head>
        <meta charset="utf-8">
        <meta http-equiv="X-UA-Compatible" content="IE=edge">
        <meta name="viewport" content="width=device-width,initial-scale=1.0">
        <meta name="robots" content="ALL">
        <link rel="icon" href="<%= BASE_URL %>favicon.ico">
        <title>식물의언어 : 식집사를 위한 식물 정보 플랫폼</title>
    
        <!--og, meta-->
        <!--기본적으로 웹에 설정해줘야하는 og 메타태그 및 Naver 블로그, 카카오톡 미리보기 설정-->
        <meta property="og:type" content="website">
        <!-- <meta property="og:url" content="https://www.plantslang.com/"> -->
        <meta id="meta_og_title" property="og:title" content="식물의언어">
        <meta id="meta_og_image" property="og:image" content="opengraph.webp">
        <!-- <meta property="og:description" content="식집사를 위한 식물 정보 플랫폼, 식물의언어를 찾아오세요"> -->
        <meta property="og:site_name" content="식물의언어">
        <meta property="og:locale" content="ko_KR">
        <meta property="og:width" content="1200">
        <meta property="og:height" content="630">
    
    
        <!-- <meta name="description" content="식집사를 위한 식물 정보 플랫폼, 식물의언어를 찾아오세요"> -->
        <!-- <meta name="keywords" content="식물의언어, 식물의언어, 식물, plantslang"> -->
    
        <!--phone 설정-->
        <meta name="theme-color" content="#365650">
        <meta name="msapplication-navbutton-color" content="#365650">
        <meta name="apple-mobile-web-app-status-bar-style" content="black-translucent">
        <meta name="application-name" content="식물의언어">
        <meta name="msapplication-tooltip" content="식물의언어">
        
    
      </head>
      <body>
        <noscript>
          <strong>We're sorry but <%= htmlWebpackPlugin.options.title %> doesn't work properly without JavaScript enabled. Please enable it to continue.</strong>
        </noscript>
        <div id="app"></div>
        <!-- built files will be auto injected -->
      </body>
    </html>

    만약 description의 주석처리를 해제한다면 뒤에 vue-meta로 설정한 description과 중복이 발생하게 된다.
    중복이 발생하면 두개의 description을 이어 붙인다. 즉, 모든 페이지 별로 description이 중복되는 현상이 발생된다.
    https://www.searchenginejournal.com/google-on-how-it-handles-extra-meta-descriptions-and-title-tags/368600/#close
  4. 페이지(route)별 meta tag를 설정한다.

'VueJS' 카테고리의 다른 글

VueJS 3.0 form validating  (0) 2022.01.08
Vue Authentication  (0) 2022.01.08
AWS 에 Jenkins와 Nginx 이용하여 vue project 올리기  (0) 2022.01.02
Vue 3 - 5. Props With Types  (0) 2021.12.28
Vue3 - 4.Custom type의 데이터  (0) 2021.12.28
728x90

VueJS에서 form의 입력값의 유효성을 검증하는 방법에 대하여 알아보자.

library는 VeeValidate를 사용한다.

VeeValidate는 기존의 데이터입력 => rules.js 생성 => rule 생성 => validation => error, success, warning 을 모두 한번에 처리할 수 있다.

Setup

npm i vee-validate@next --save
or
yarn add vee-validate@next

Vue3 에서 VeeValidate를 사용할 수 있는 방법으로는 2가지가 있다.

Field Component Composition API
Simplest approach More control
Hard to customize / Only simple UI components Intuitive API
  Easy to use custom components

기본적인 사용법

import {useField,useForm} from 'vee-validate';

export default {
  setup(){
    function onSubmit(){
      alert('submit');
    }
    
    const validations = {
      email: value => {
        if(!value) return 'This field is required'; //error message
      
        const regex = /.../;
        if(!regex.test(String(value).toLowerCase())){
          return 'Please enter a valid email address';
        }
      
        return true;
      },
      password: value => {
        if(!value) return 'This field is required'; //error message
      
        return true;
      }
    }
    
    useForm({
      validationSchemal: validations
    })
    
    const email = useField('email');
    const password = useField('password');
    
//    useField만 사용할때
//    const email = useField('email',function(value){ // true 면 value 반환, false면 errorMessage 반환
//      if(!value) return 'This field is required'; //error message
//      
//      const regex = /.../;
//      if(!regex.test(String(value).toLowerCase())){
//        return 'Please enter a valid email address';
//      }
//      
//     return true;
//    })
    
    return{
      onSubmit,
      email: email.value,
      emailError: email.errorMessage,
      password: password.value,
      passwordError: password.errorMessage,
    }
  }
}
  • useField: single field validation
  • useForm: validating at form level

Advanced 사용법

<template>
  <div>
    <BaseCheckbox
      label="Catering"
      v-model="catering"
      :error="cateringError"
     />
     ...
  </div>
<template>

<script>
import {useField, useForm} from 'vee-validate'
export default{
setup(){
  const required = value => {
    const requiredMessage = 'This field is required';
    if(value === undefined || value===null) return requiredMessage;
    if(!String(value).length) return requiredMessage;
    
    return true;
  }
  
  const minLength = (number,value)=>{
    if(String(value).length < number ) return 'Please type at leat ' + number;
  }
  
  const anything = ()=> true;
  
  const validationSchema = {
    category:required,
    title: value => {
      const req = required(value);
      if(req!==true) return req;
      const min = minLength(3,value);
      if(min!==true) return min;
      return true;
    },
    description: required,
    location: undefined, // anything과 같은 효과
    pets: anything,
    catering: anything,
    music: anything
  }
  
  useForm({
    validationSchema
  });
  
  const {value: category, errorMessage: categoryError} = useField('category');
  const {value: title, errorMessage: titleError} = useField('title');
  const {value: description, errorMessage: descriptionError} = useField('description');
  const {value: location, errorMessage: descriptionError} = useField('location');
  const {value: pets, errorMessage: petsError} = useField('pets',undefined,{initialValue:1});
  const {value: catering, errorMessage: cateringError} = useField('catering',undefined, {initialValue:false});
  const {value: music, errorMessage: musicError} = useField('music',undefined,{initialValue:false});
  
  return{
    category,
    cateoryError,
    title,
    titleError,
    description,
    descriptionError,
    location,
    locationError,
    pets,
    petsError,
    catering,
    cateringError,
    music,
    musicError,
  }
  
}
}
</script>

위의 validation은 개별적으로 erorrMessage는 보여주지만 submit을 막지는 못한다.

 => 하나의 field라도 에러가 있다면 막아주는 함수가 바로 handleSubmit이다. 사용법은 다음과 같다.


또한 작업또한 굉장히 반복적이고 변수선언도 너무 많아진다.

 => useForm의 기능 (errors, initialValues) 로 해결할 수 있다.


<template>
  <form @submit="submit">
    <h1> Create an Event </h1>
    <BaseSelect
      label="Select a category"
      :options="categories"
      v-model="category"
      :error="errors.category"
    />
    ...
  </form>
</template>
<script>
import {useField, useForm} from 'vee-validate'
export default{
  setup(){
    ...
    const {handleSubmit, errors} = useForm({
      validationSchema,
      initialValues:{
        pets:1,
        catering:false,
        music:false
      }
    });
    const {value: category} = useField('category');
    const {value: title} = useField('title');
    const {value: description} = useField('description');
    const {value: location} = useField('location');
    const {value: pets} = useField('pets');
    const {value: catering} = useField('catering');
    const {value: music} = useField('music');
    
    const submit = handleSubmit(values=>{
      console.log('submit',values);
    })
    return{
      ..., // 개별적인 errorMessage는 모두 삭제
      submit,
      errors,
    }
  }
}
</script>

yup

validation rule을 생성하는것도 굉장히 귀찮은 일중에 하나이다. 이를 해결해 줄수 있는 라이브러리가 yup이다.

npm install yup
import {useField, useForm} from 'vee-validate';
import * as yup from 'yup';
export default{
  setup(){
    const validationSchema = {
      category: yup.string().required(),
      title:yup.string().required('A cool title is required').min(3),
      description:yup.string().required(),
      location:yup.string(),
      pets: yup.number(),
      catering: yup.boolean(),
      music: yup.boolean(),
    }
    const {handleSubmit, errors} = useForm({
      validationSchema,
      initialValues:{
        pets:1,
        catering:false,
        music:false
      }
    });
    const {value: category} = useField('category');
    const {value: title} = useField('title');
    const {value: description} = useField('description');
    const {value: location} = useField('location');
    const {value: pets} = useField('pets');
    const {value: catering} = useField('catering');
    const {value: music} = useField('music');
    
    const submit = handleSubmit(values=>{
      console.log('submit',values);
    })
    return{
      ..., // 개별적인 errorMessage는 모두 삭제
      submit,
      errors,
    }
  }
}

Lazy Validation

input 이 focus를 잃은 후 입력값의 validation을 체크하는 것이 옳다. 이를 위해 validation은 change event에 trigger 되어야한다.

<template>
  <BaseInput
    label="Email"
    type="email"
    :error="emailError"
    :modelValue="email"
    @change="handleChange"
  >
</template>

<script>
  setup(){
    ...
    const {setFieldValue} = useForm({
      validationSchema: validations
    })
    
    const {value:Email, errorMessage:emailError} = useField('email');
   
    const handleChange = (event) =>{
      setFieldValue('email',event.target.value);
    }
    return{
      onSubmit,
      email,
      emailError,
      handleChange
    }
  }

</script>

'VueJS' 카테고리의 다른 글

Vue3 google SEO 등록하기  (0) 2022.04.15
Vue Authentication  (0) 2022.01.08
AWS 에 Jenkins와 Nginx 이용하여 vue project 올리기  (0) 2022.01.02
Vue 3 - 5. Props With Types  (0) 2021.12.28
Vue3 - 4.Custom type의 데이터  (0) 2021.12.28
728x90

Token-Based Authentication

JSON Web Tokens(JWT)을 이용하여 front-end auth solution을 만드는 방법을 알아보자.

사용할 모듈은 Router, Vuex, Axios가 되겠다.


Authentication 이 작동하는 방식

  1. Client가 Server에 Login 요청
  2. UserId와 password가 일치한다면 Server는 JWT 토큰 생성하여 Client에 반환
  3. Client는 Server로 부터 받은 JWT 토큰은 local storage에 저장
  4. 추후 Client에서 API 호출 시 HTTP request header에 localstorage에 저장된 JWT 토큰 실어서 전송
  5. Client가 로그아웃한다면 로그아웃 API 호출 및 localstorage에서 JWT 토큰 제거.

JWT 토큰 구성

  • 헤더 : Type(JWT), Hasing algorithm
  • Payload : Info we're transmitting. ex.) iss(issuer: 'verlopert.com'), exp(expiresIn: '7d', admin(admin:'false')
  • Signature : Hash of Header + Payload + Secret

VueJS Authentication 구현 과정

  1. Register users
  2. Login users
    • /register와 /login api는 userData({token,email,name})을 반환한다.
  3. Vuex
    • userData를 State에 저장한다.
    • userData를 localStorage에 저장한다.
    • token을 axios header default 설정으로 더해준다.
  4. Access protected data
  5. Logout
    • Vuex State로부터 userData를 지운다
    • localStorage로부터 userDAta를 지운다
    • axios header default 설정에 token을 지워준다

User Registration

과정

  1. RegisterUser.vue를 생성한다.
    • 유저 가입 정보(name,email,password)를 입력받는다.
    • //RegisterUser.vue
      ...
      methods:{
        register(){
          this.$store.dispatch('register',{
            name:this.name,
            email:this.email,
            password:this.password
          })
          .then(()=>{
            this.$router.push({name:'dashboard'});
          })
        }
      }
  2. Vuex
    • 유저 가입 정보를 서버로 전송한다. (/register api)
    • 반환된 userData(token,email,name)을 State와 localStorage에 저장한다.
    • Axios header에 토큰을 default 상태로 더해준다.
    • //store.js
      ...
      export default new Vuex.Store({
        state: {
          user:null
        },
        mutations:{
          SET_USER_DATA(state,userData){
            state.user = userData;
            localStorage.setItem('user',JSON.stringify(userData));
            axios.defaults.headers.common['Authorization'] = `Bearer ${userData.token}`
          }
        },
        actions:{
          register({commit}, credentials){
            return axios.post('//localhost:3000/register',credentials).then(
            ({data})=>{
              commit('SET_USER_DATA',data);
            })
          }
        }
      })

Login

과정

  1. RegisterUser.vue를 생성한다.
    • 유저 email, password를 입력받는다.
    • //LoginUser.vue
      ...
      methods:{
        login(){
          this.$store.dispatch('login',{
            email:this.email,
            password: this.password
          })
          .then(()=>{
            this.$router.push({name:'dashboard'})
          })
        }
      }
  2. Vuex 
    • 유저 가입 정보를 서버로 전송한다. (/login api)
    • 반환된 userData(token,email,name)을 State와 localStorage에 저장한다.
    • Axios header에 토큰을 default 상태로 더해준다.
    • //store.js
      ...
      export default new Vuex.Store({
        state: {
          user:null
        },
        getters:{
          loggedIn(state){
            return !!state.user;
          }
        }
        mutations:{
          ...
        },
        actions:{
          ...,
          login({commit}, credentials){
            return axios.post('//localhost:3000/login',credentaials)
            .then(({data})=>{
              commit('SET_USER_DATA',data);
            })
          }
        }
      })

Logout

  1. logout button과 logout method를 생성한다.
    • //AppNav.vue
      ...
      methods{
        logout(){
          this.$store.dispatch('logout')
        }
      }
  2. VueX
    • //store.js
      ...
      export default new Vuex.Store({
        state: {
          user:null
        },
        getters:{
          ...
        }
        mutations:{
          ...,
          CLEAR_USER_DATA(state){
            state.user = null;
            localStorage.removeItem('user');
            axios.default.headers.common['Authorization'] = null
          }
        },
        actions:{
          ...,
          logout({commit}){
            commit('CLEAR_USER_DATA')
          }
        }
      })
  3.  protected data(dashboard route) 접근 제한
    • logout 되더라도 dashboard page에 여전히 남아있다.
    • route에 Navigation Guard를 추가함으로써 해결할 수 있다.
    • //router.js
      const router = [
        ...
        {
          path:'/dashboard',
          name:'dashboard',
          component: Dashboard,
          meta: { requiresAuth: true},
        },
        ...
      ];
      
      router.beforeEach((to,from,next)=>{
        const loggedIn = localStorage.getItem('user');
        
        if(to.matched.some(record=>record.meta.requiresAuth) && !loggedIn){ // to.matched는 이동할 route와 match되는 route들
          next('/') // redirect to homepage
        }else{
          next() // direct to to
        }
      })
      
      export default router;

Error Handling

어떤 에러가 발생할 수 있을까?

  • User가 유효하지않은 id/password로 로그인 시도
  • 회원가입 시 이미 가입된 Email일때
  • 회원가입 시 password의 format이 유효하지않을때

Login Error Handling

//LoginUser.vue
...
methods:{
  login(){
    this.$store.dispatch('login',{
      email:this.email,
      password:this.password
    })
    .then(()=>{
      this.$router.push('dashboard');
    })
    .catch(err=>{
      this.error = err.response.data.error;
    })
  }
}

Register Error Handling

//RegiserUser.vue
...
methods:{
  register(){
    this.$store.dispatch('register',{
      name:this.name,
      email:this.email,
      password:this.password
    })
    .then(()=>{
      this.$router.push({name:'dashboard'});
    })
    .catch((err)=>{
      this.error = err.response.data.error
    })
  }
}


  • Client-side form validation 을 하고 싶다면 다음 Post에서 볼 수 있다.
  • component내에서 error handling을 유지하도록 하기위해 VueX내에서 error handling을 하지 않는다
    • 만약 여러 컴포넌트에서 사용하는 재사용 기능이라면 action내에서 state change를 위해 error handling을 해야할 것이다.
      만약 너의 에러가 컴포넌트에서 UI상 보여지는게 목적이라면 컴포넌트내에서 error handling을 해야할 것이다.

Automatic Login

페이지가 refresh 되더라도 로그인 상태를 유지하게 만들어보자.

//main.js

import Vue from 'vue'
import App from './App.vue'
import router from './router'
import state from './vuex/store'

Vue.config.productionTip = false;

new Vue({
  router,
  store,
  created(){ // created lifecycle hook 생성
    const userString = localStorage.getItem('user');
    if(userString){
      const userData = JSON.parse(userString);
      this.$store.commit('SET_USER_DATA',userData);
    }
  },
  render:h => h(App)
}).$mount('#app');

web 이 생성되면 localStorage를 보고 vuex에 다시 저장한다.


만약 누군가가 localStorage에 임의의 token을 집어넣어서 권한이 없는데도 접근하면 어쩌지?

localStorage에 강제로 값을 집어넣었을때 이를 detect할수 있는 client-side 보안 기능을 만들어보자

//main.js

import Vue from 'vue'
import App from './App.vue'
import router from './router'
import state from './vuex/store'
import axios from 'axios'

Vue.config.productionTip = false;

new Vue({
  router,
  store,
  created(){ // created lifecycle hook 생성
    const userString = localStorage.getItem('user');
    if(userString){
      const userData = JSON.parse(userString);
      this.$store.commit('SET_USER_DATA',userData);
    }
    axios.interceptors.respose.use(
      response=> response,
      error =>{
        if (error.response.status == 401){
          this.$store.dispatch('logout');
        }
        return Promise.reject(error)
      }
  },
  render:h => h(App)
}).$mount('#app');

localStorage의 token값이 잘못된 상태로 서버에 protected api를 요청하면 401에러를 받는데

401에러를 받으면 강제로 로그아웃 시켜버린다.

'VueJS' 카테고리의 다른 글

Vue3 google SEO 등록하기  (0) 2022.04.15
VueJS 3.0 form validating  (0) 2022.01.08
AWS 에 Jenkins와 Nginx 이용하여 vue project 올리기  (0) 2022.01.02
Vue 3 - 5. Props With Types  (0) 2021.12.28
Vue3 - 4.Custom type의 데이터  (0) 2021.12.28
728x90

Overview

AWS에 Jenkins와 Nginx를 이용하여 vue project를 올리는 방법에 대하여 알아보자

이 때 git repository에 project commit이 push 될때 자동으로 빌드가 이루어지도록한다 (CD)

  1. EC2에 linux (or window) 인스턴스 생성
  2. EC2 인스턴스에 Security Group 설정
  3. git webhook 설정
  4. git credential token 발급
  5. EC2에 에 Jenkins 및 daemonize 문제 해결
  6. Jenkins 설정 변경 (git credential, item 생성)
  7. EC2에 nginx 설치
  8. nginx 설정 변경(conf.d)
  9. 빌드!

1. EC2에 linux 인스턴스 생성

관련 내용은 쉽고 넷상에 많이 나오므로 링크로 생략

https://victorydntmd.tistory.com/61


[AWS] EC2 (1) - EC2 인스턴스 생성하기

2020.02.06 수정 1. 서비스 소개 AWS EC2는 간단하게 가상서버라고 생각할 수 있으며, 몇 가지 주요 특징은 다음과 같습니다. 클릭 몇 번 만으로 가상 컴퓨팅 환경을 제공받을 수 있음 원하는 만큼 가

victorydntmd.tistory.com

2. EC2 인스턴스에 Security Group 설정

aws console EC2 > 사용할 인스턴스 Detail로 페이지 > Security tab > secity groups 클릭

Edit inbound rules > 다음 개방 포트 추가 


8080은 Jenkins가 작동할 포트이다. Jenkins 설정 변경을 위해 접속할 일이 있으니 열어두도록하자. 단, 진짜 서비스의 경우 개방 범위를 0.0.0.0/0으로 하면 모든 사람이 들어올 수 있으니 이 때는 제한하도록 하자.

포트 3000이나 80 둘중 하나만 열어도 된다. 웹서버 nginx가 web application을 띄울 포트를 열도록한다. 모든 사람이 접속할 수 있어야 하므로 개방 범위를 0.0.0.0/0으로 설정하자.


3. github webhook 설정 및 developer authentication 생성

GitHub Webhook

  • Webhook을 사용하면 GitHub Apps 또는 OAuth Apps와 같은 integration을 빌드하거나 설정할 수 있다. 
  • 이러한 이벤트(예: commit code) 중 하나가 트리거되면 HTTP POST Payload를 webhook에 설정된 URL로 보낸다. 
  • webhook을 이용해 CI 빌드를 트리거하거나 production 서버에 배포할 수 있다.

vue project 의 repository > setting 탭 > webhook 탭

  • Payload URL : "EC2에서 Jenkins 서비스 URL"/github-webhook/
    • webhook POST request를 받을 서버의 URL 정의. jenkins의 경우 뒤에 github-webhook/ path를 명시해줘야 한다.
  • Content type: application/json
    • webhoook을 어떤 형태로 받을지에 대한 정의. 여기서는 json으로 받음
  • Just the push event
    • push event가 발생했을 시에만 webhook이 trigger되도록 함

4. git personal access token 발급

내 프로필 > settings > Developer settings 탭 > Personal access tokens 탭 > Generate new token > repo 체크


발급된 personal access token를 꼭 기억하도록 한다


git에서의 setting이 모두 끝났다. 이제 Jenkins 설치 및 설정 과정에대해 알아보자.

5. EC2에 Jenkins 및 Git 설치

Jenkins 설치

Jenkins 설치 방법은 넷상에 널려 있으니 이 또한 링크로 대체

https://bokyung.dev/2021/03/17/jenkins-install/


Amazon Linux2에 Jenkins 설치하기

로컬 도커환경에서 Jenkins를 테스트 하던 중에 에러가 나는 경우가 있어서 검증을 위해서 Amazon Linux2에 Jenkins를 설치 해 보았습니다. 설치한 Jenkins 환경 Amazon Linux2 AMI ID : ami-0f27d081df46f326c AMI 이름 :

bokyung.dev

만약 설치 중간에 다음의 에러가 발생한다면

$ sudo yum install jenkins
...
Error: Package: jenkins-2.319.1-1.1.noarch (jenkins)
           Requires: daemonize
 You could try using --skip-broken to work around the problem
 You could try running: rpm -Va --nofiles --nodigest

다음의 명령어를 실행 시킨후 jenkins를 설치한다

$ sudo amazon-linux-extras install epel -y
$ sudo yum install jenkins

Git 설치

https://gamoo12.tistory.com/205


[AWS] EC2 인스턴스에서 git 설치 방법

AWS EC2에서 git 설치 AWS의 EC2 인스턴스 중 Amazon Linux 2에 git을 설치하는 방법을 알아보았습니다. Yum을 이용하면 쉽게 git 설치가 가능합니다. Yum은 Yellow dog Updater, Modified의 약자로 RPM 기반의..

gamoo12.tistory.com

6. Jenkins git 연결 및 item 생성 (git credential, item 생성)

nodejs 환경 생성

시작하기 전 nodejs 환경을 만들어주기 위해 플러그인을 설치해주자.

jenkins 관리 > 플러그인 관리 > 설치 가능 탭 > nodejs 검색

설치 후 뒤늦은 캡처를 해버렸다.. 하핳..

설치가 완료되었다면 (jenkins service restart까지) jenkins 관리 > global tool configuration > NodeJs 환경 생성

git personal access token credential 저장

이전에 설정했던 github webhook을 설정하기 위해 jenkins에 git personal access token credential을 저장하도록하자.

jenkins 관리 > Manage Credentials > (global) > Add Credentials > 내용 입력


  • Kind:  Username with password
  • Scope : Global
  • Username : git username
  • password : 이전에 발급받은 git personal access token
  • ID : 임의로 지은 식별자

Item 생성

새로운 Item > 아이템 이름 지정 및 Freestyle project 선택 > 소스코드 관리에서 Git radio button 체크 > 다음 내용 입력

  • Repository URL : vue project git HTTPS 주소
  • Credential : 이전에 생성한 git personal access token credentail 선택

GitHub hook trigger for GITScm polling 체크 (webhook trigger) > Provide Node & npm bin/ folder to PATH 체크 > 이전에 만든 nodejs 환경 선택


Build Execute shell 선택 및 해당 내용 입력

asdfeeeee 는 내가 만든 Jenkins Item 이름이다. 각자의 이름에 맞게 변경토록하자.

npm run build는 만약 build 명령어가 다르다면 해당 명령어로 입력하면 된다.


7. nginx 설치

https://velog.io/@ant-now/AWS-%EC%84%9C%EB%B2%84%EC%97%90-Nginx-%EC%84%A4%EC%B9%98


AWS 서버에 AMI Nginx 설치

sudo yum install nginx 로 안됨. 왜냐면 아마존 리눅스에서 사용하는 엔진엑스가 따로 있기 때문sudo amazon-linux-extras install nginx1 로 설치하자.Amazon Linux 2 FAQs(https://aws.amaz

velog.io

8. nginx build file 경로 지정 및 서비스 포트 설정

$ cd /etc/nginx/conf.d
$ vim default.conf //아무 이름이나 만들어도 된다.

// default.conf에 다음내용을 입력한다.

server {
        listen 80       default_server;
        listen  [::]:80 default_server;

        root    /var/lib/jenkins/workspace/asdfeeeee/dist;
        index   index.html      index.htm;
        server_name     _;

        location/{
                try_files	$uri    $uri/   /index.html;
        }
}

//설정 완료후
$ sudo service nginx restart


  • 웹 페이지를 80번 포트에서 서비스 하기위해 80번 포트를 열었다.
  • root의 경로를 build 시 build 파일이 생성되는 "jenkins item 경로"/dist 로 지정했다.
  • 입력 한 conf값 저장후 nginx 웹서버를 재시작한다.

※만약 wq! 로 저장이 안된다면 현재 ec2-user linux 계정이 저장할 권한이 없는 것이다. 미리 sudo su 로 권한을 root로 변경하던지 저장할때 wq! 대신 w !sudo tee % > /dev/null 로 저장한다. 


이제 public ip로 접속하면 만들어진 화면이 나옴을 볼 수 있다.

'VueJS' 카테고리의 다른 글

VueJS 3.0 form validating  (0) 2022.01.08
Vue Authentication  (0) 2022.01.08
Vue 3 - 5. Props With Types  (0) 2021.12.28
Vue3 - 4.Custom type의 데이터  (0) 2021.12.28
Vue3 - 3.Type Fundamentals  (0) 2021.12.28
728x90
<script>
import {EventItem,PropType} from '../types' // PropType: helper method

export default defineComponent({
  props:{
    event:{
      type: Object as PropType<EventItem>, // type: EventItem 또는 type: Object as EventItem으로 쓰면 에러가 발생
                                           // Props에서는 Vue에서 지정한 방법으로 타입을 정의해야한다.
      required: true
    }
  }
}) 
</script>


Generic 이란?

function createList(item:number) : number[] { // number뿐만 아니라 다른 타입에서도 작동하도록 resuable하게 만들자
  const newList : number[] = [];
  newList.push(item);
  return newList;
}

위의 함수를 number뿐만아니라 string또는 Boolean과 같은 다른 타입의 리스트를 반환하도록 만들고 싶다.

Genericc은 함수에서 사용되는 변수의 type을 Dynamic하게 정의할 수 있도록 해준다.

fucntion createList<T>(item:T):T[]{
  const newList: CustomType[] = [];
  newList.push(item);
  return newList;
}

const numberList = createList<number>(123);
const stringList = createList<string>("Hello");


'VueJS' 카테고리의 다른 글

Vue Authentication  (0) 2022.01.08
AWS 에 Jenkins와 Nginx 이용하여 vue project 올리기  (0) 2022.01.02
Vue3 - 4.Custom type의 데이터  (0) 2021.12.28
Vue3 - 3.Type Fundamentals  (0) 2021.12.28
Vue3 - 2. Vue3 + Typescript  (0) 2021.12.28
728x90

VSCode 상에 VueDX를 설치하고 시작하자. vue에서 typescript editor service를 제공한다.

  • interface을 정의하는 type을 하나의 파일에서 관리토록한다.

// ./src/types.ts

export interface EventItem {
  id : number
  category : string
  title : string
  description : string
  location: string
  date: string
  time: string
  organizer: string
}
  • single component file에서 다음과 같이 불러온다. reactive data의 type 지정은 타입 단언으로 설정한다.
<script>
import {EventItem} from '../types'

export default defineComponent({
  data(){
    return{
      event: {} as EventItem // Type Assertion
    }
  }
})
</script>

'VueJS' 카테고리의 다른 글

AWS 에 Jenkins와 Nginx 이용하여 vue project 올리기  (0) 2022.01.02
Vue 3 - 5. Props With Types  (0) 2021.12.28
Vue3 - 3.Type Fundamentals  (0) 2021.12.28
Vue3 - 2. Vue3 + Typescript  (0) 2021.12.28
Vue3 - 1. Composition API  (0) 2021.12.11
728x90

Vue3-3.Type Fundamentals

Javascript의 대표적인 타입(Primitive + NonPrimitive) : String, Number, Boolean, Array, Function, Object, Null, Undefined, ...

Typescript는 Javascript보다 더 많은 타입을 가지고 있다

  • any : 모든 타입을 허용하며 type checking을 비활성화 시킨다.
  • tuple : 미리 설정된 타입의 데이터들을 가진 고정된 길이의 배열.
  • enum : 값의 집합에 친숙한 이름을 짓게 해준다.
    • enum ArrowKeys {
        Up, //1
        Down, //2
        Left=10, // 10
        Right=5, //4
      }
  • unknown, never, ... 등등이 있음
  • Object 타입 정의 방법
    • 직접 정의
    • let person : { name: string, age: number, activeAvenger: boolean, powers: string[], } = { name: 'Peter Parker', age: 20, activeAvenger: true, powers:['wall-crawl', 'spider-sense'] }

Type and Interface

type 은 데이터가 어떤 구조를 가져야 할지 정의해준다.

  • type buttonType = 'primary' | 'secondary' | 'success' | 'danger' let buttonStyles: buttonType = 'primary' // O let buttonStyles : buttonType = 'error' // X

interface object의 타입을 정의하기 위해 사용한다.

  • interface Hero {
      name : string;
      age : number;
      activeAvenger : boolean;
      powers : string[];
      universe : ComicUniverse; // type ComicUniverse = 'Marvel' | 'DC'
    }
    
    let person:Hero = {
      name: 'Peter Parker',
      age: 20,
      activeAvenger : true,
      powers: ['wall-crawl', 'spider-sense'],
      universe : 'Marvel'
    }
    Object를 제외한 데이터 타입 정의에는 Type을 쓰도록하자.

'VueJS' 카테고리의 다른 글

Vue 3 - 5. Props With Types  (0) 2021.12.28
Vue3 - 4.Custom type의 데이터  (0) 2021.12.28
Vue3 - 2. Vue3 + Typescript  (0) 2021.12.28
Vue3 - 1. Composition API  (0) 2021.12.11
vue3 - 0.주요 특징  (0) 2021.12.10
728x90

Vue3 + Typescript 프로젝트 생성 방법

  1. vue cli 설치 (버전: 4.5.8)
    • npm install -g @vue/cli
  2. Vue3 프로젝트 생성
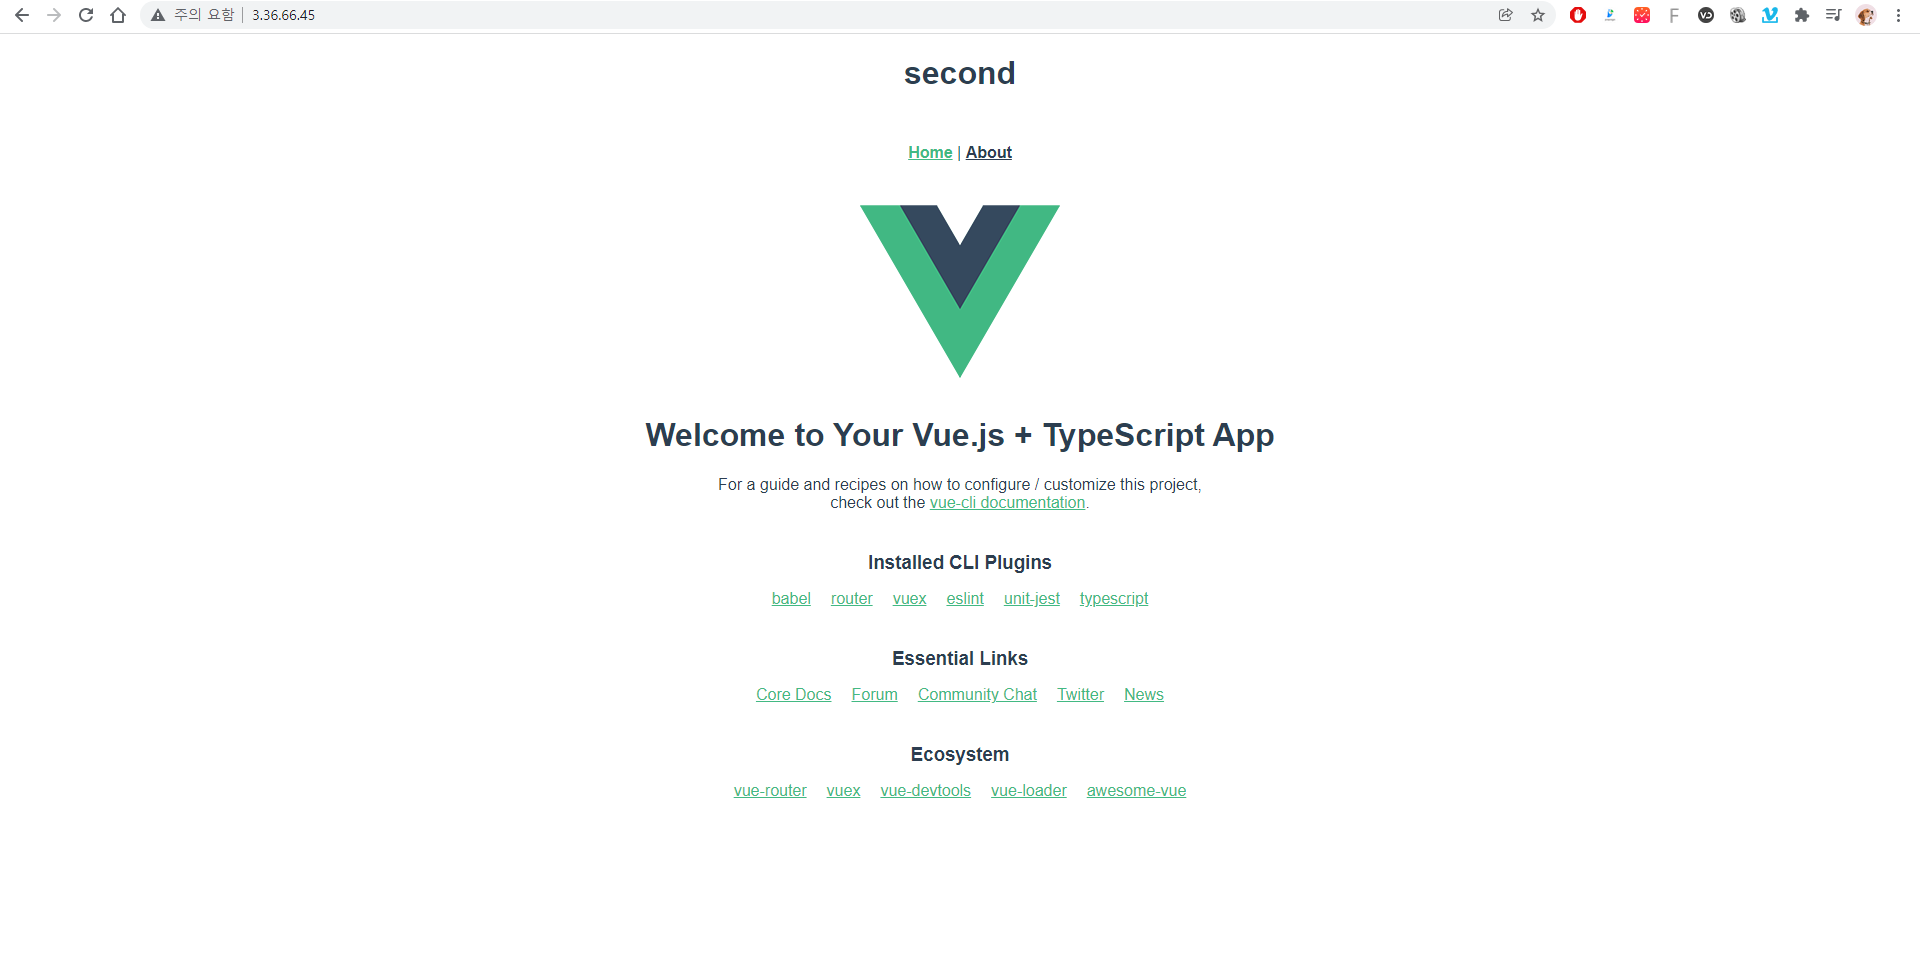
    • vue create vue3-and-typescript
    • Babel, Typescript, 3.x, no class style 설정

기존 Vue3 프로젝트에 Typescript 설정하는 방법

vue add typescript
- vue/cli upgrade
- Babel, no class style 설정
- convert all .js file to .ts
- skip type checking to all declaration files

프로젝트 구조

  • main.ts : 기존 javascript로 구성된 main.js와 동일
  • shims-vue.d.ts : Typescript의 Helper file이다. vue 파일에서 일어나는 일들에 대해 정의가 내려져 있다. 수정 불필요

Component에 Typescript 적용하는법

<script lang="ts">
  import {defineComponent} from 'vue' // import vue helper function
  export default defineComponent{
    data(){
      return {}
    },
  }
</script>
  • defineComponent : typescript를 컴파일 할 수 있는 component를 정의해준다. single file component에 설정.

'VueJS' 카테고리의 다른 글

Vue3 - 4.Custom type의 데이터  (0) 2021.12.28
Vue3 - 3.Type Fundamentals  (0) 2021.12.28
Vue3 - 1. Composition API  (0) 2021.12.11
vue3 - 0.주요 특징  (0) 2021.12.10
array / object prototype  (0) 2021.06.27

+ Recent posts